From the WordPress dashboard, select Posts > Add New.
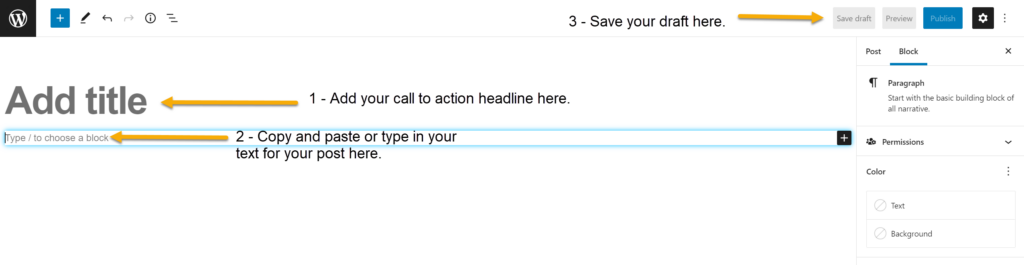
1 – Add a title (headline). You will want to make this a call to action, e.g. Attend the Dean’s Distinguished Lecture, Nominate staff for the Fulton Difference Awards.
2 – Press Enter and you will see a field that says ‘Type / to choose a block’.
Add the text/body copy for your post. Copy and paste from a document or type it directly into the editor.
3 – Save your draft by clicking Save draft in the upper right corner. Save often as WordPress does not auto-save.
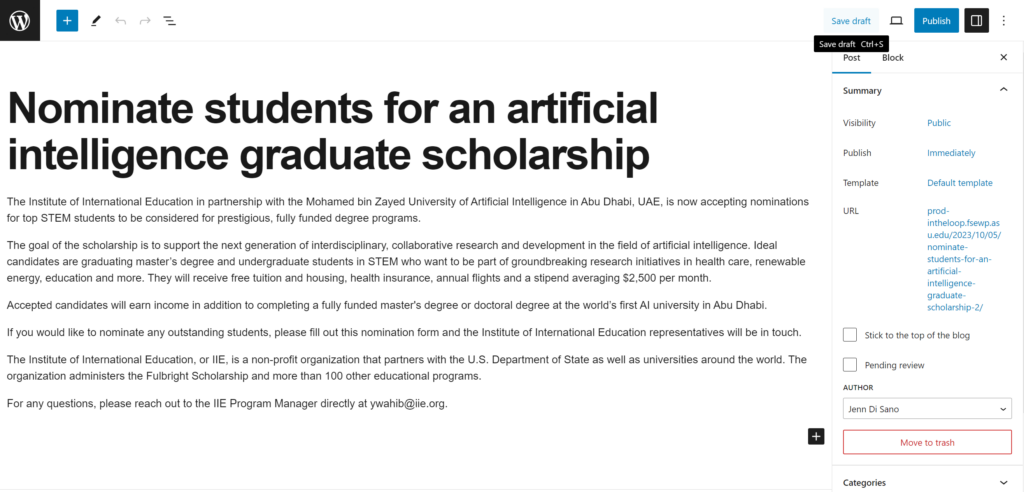
After adding your headline and body copy, your post should look like this:
Next, you will add categories, attachments like a PDF flyer, and a featured image.
Click the Post tab in the right sidebar.
4 – Select the relevant categories. In the Loop has four types of categories: Categories, Audiences, Organizations and Series. Select all that are relevant to your event or opportunity.
- Categories: What type of event or opportunity is this? Select all categories that apply.
- Audiences: Select the relevant audiences for this content, both people and campus locations. ASU-categorized opportunities are open to anyone at ASU, and Fulton Schools-categorized opportunities are those only open to the Fulton Schools community.
- Organizations: Does your content relate to a specific school or unit in the Ira A. Fulton Schools of Engineering? Use these categories.
- Series: These categories are for special recurring series from the Academic Integrity Office, FSE Learning and Teaching Hub or announcements from the dean. Most contributors will not use these categories.
Don’t know? Leave it blank and our team will assist. The editing team will also review your category selections for relevance and may make changes.
5 – Add a Featured image to your post (optional).
This image appears at the top of your post underneath the headline.
It should have a horizontal orientation and should have a file size smaller than 1 MB.

The Media Library will open. Drag and drop or upload your image into the library. Select it.
On the right, fill in the Alt Text field for the image. This is required by law for accessibility at all universities. Describe the image for visitors who use screen readers. In the example, the Alt Text is “Imaginative drawing of people and a huge one-eyed monster gathered in a big room, having a party.”
Optionally, you can add a caption, which may be displayed with your image in the post. In the example, the caption is “Join us for Sam’s Gnarly D&D Party! Monsters welcome!”
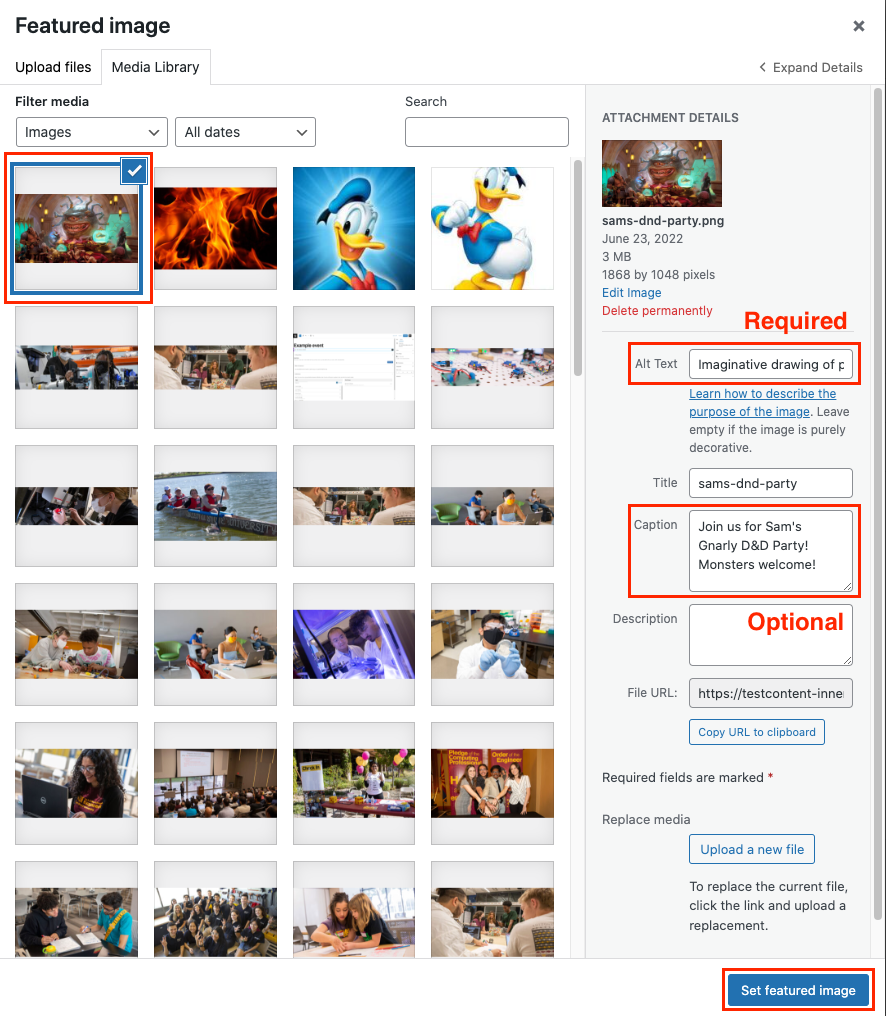
Click the “Set the featured image” button in the lower right corner to complete this step.
6 – Next you can add attachments like a PDF flyer. Click Add File and upload your document to the media library.
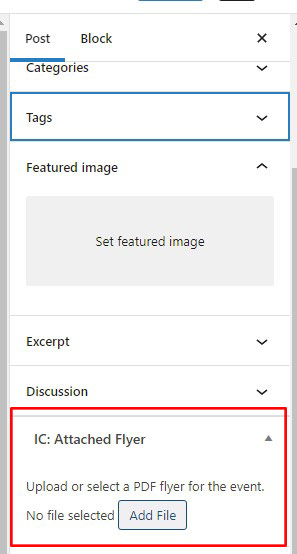
You will be prompted to add your document to the media library. After uploading, click Select (lower-right corner).
Only document formats are accepted. Make sure the text of your PDF is selectable before uploading.

Save draft again. [Better safe than sorry. WordPress does not save automatically.]
If you are done, click Publish and then Submit for review.


This action does not make your post live on the website immediately. Your post is pending until one of our editors approves it (within 48 hours of submitting).
The deadline for submissions is 5 p.m. on Tuesday for the newsletter going out to Fulton Schools faculty and staff on Wednesday.
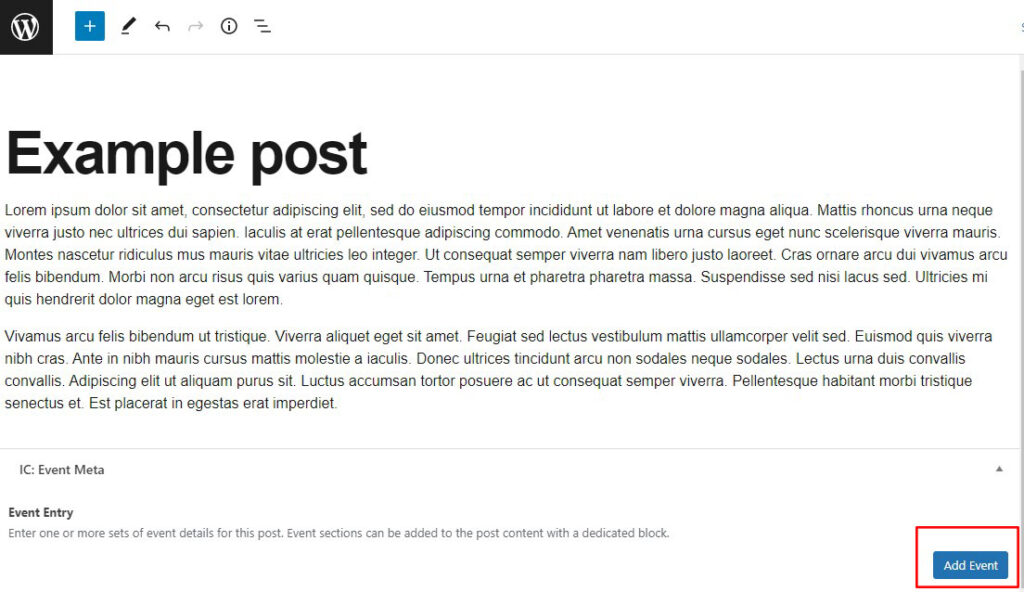
Is your post promoting an event?
Click Add Event in the lower right corner.
In the Titles and Links tab, add the name of the event and a subtitle and link if needed. The link might be to a registration page or to a website with more information.

For the Event Link, click Select Link.
Add the URL and Link Text. The Link Text will be a call to action like Register now or Apply.

For Dates, there are four different display options. The most common is Standard Date.
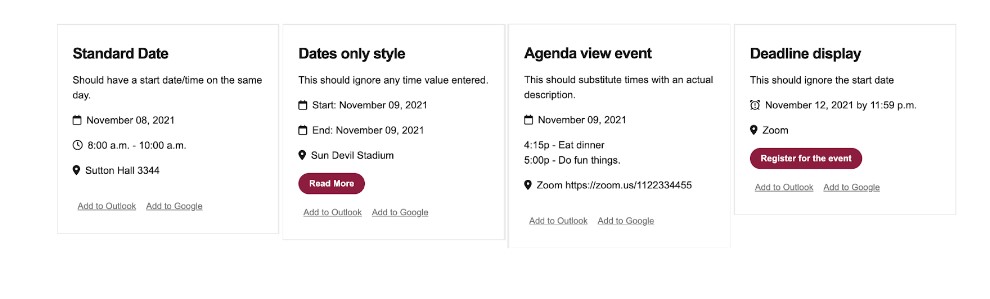
Standard dates
The standard date display is the most commonly used.
It’s for events taking place on a single day with a start and end time.

Click the Dates tab, the options default to Standard. This option is for a single-day event with a start and end time.

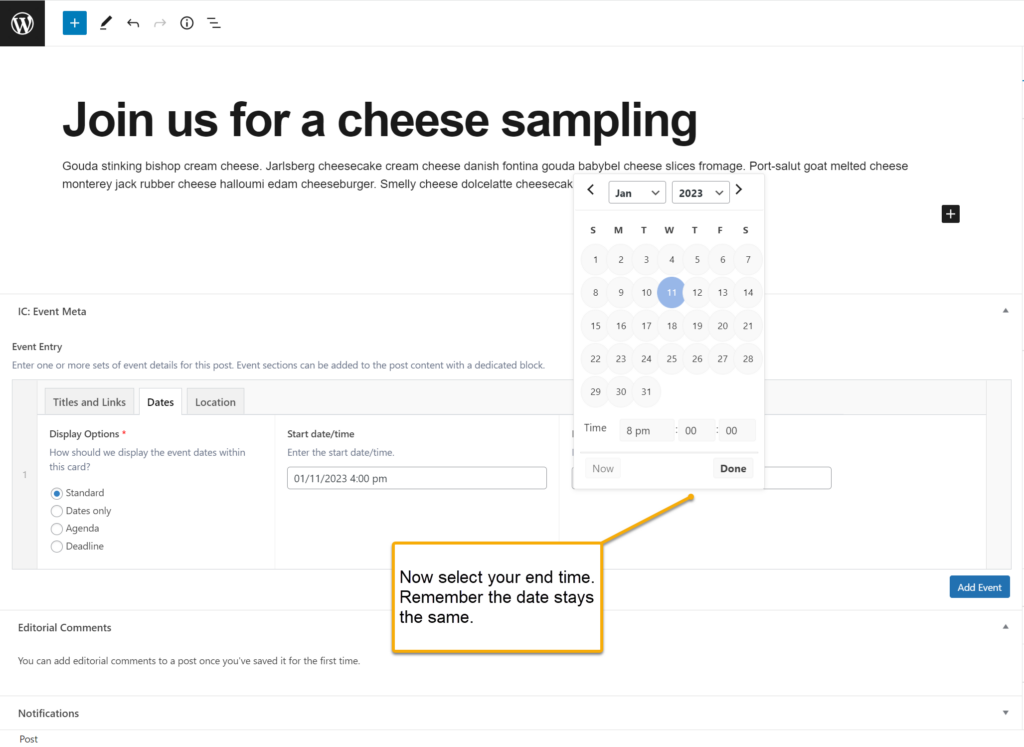
Click inside the Start date/time field. A calendar will pop up and you can select the date and set the start time.
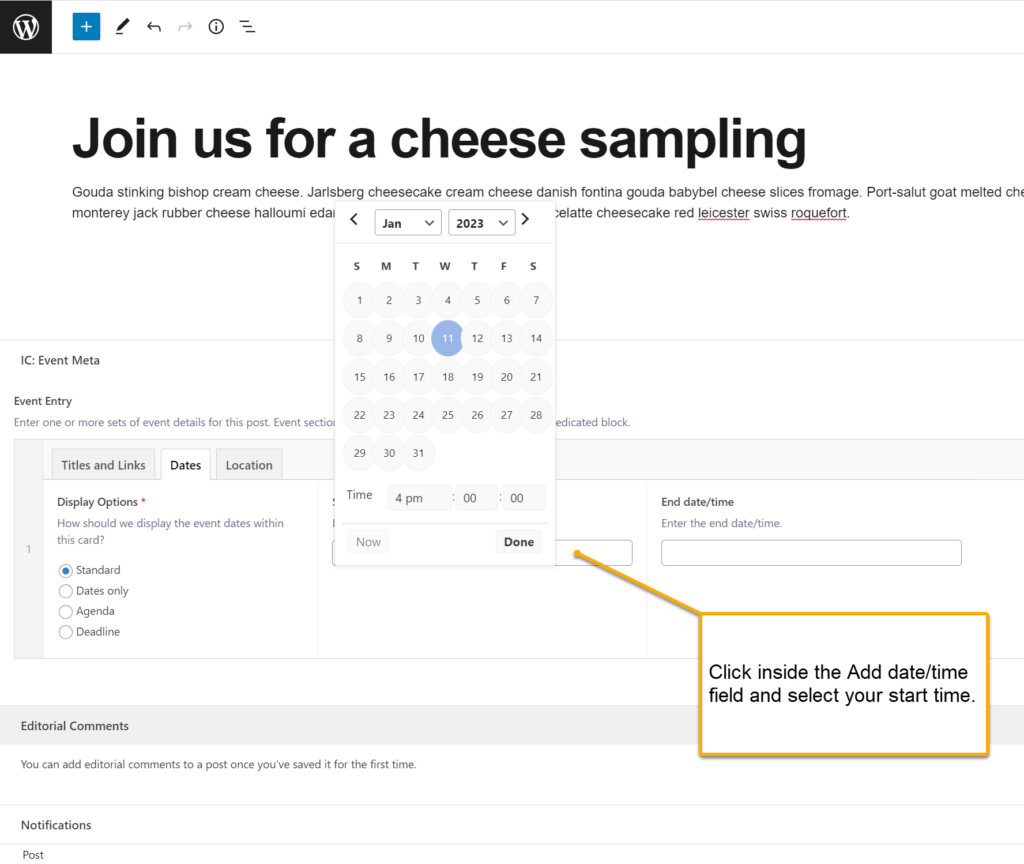
Do the same for End date/time.
Next, click the Location tab. The Building drop-down menu lists venues where the majority of Fulton Schools events are held. Select a building from the list and add a room number in the adjacent field if needed.

If the event is at a location not listed in the Building dropdown menu, you can type the address or the ASU building into the Room field (an In the Loop editor will add the ASU building to the list for you).

Using other display options
Dates only style
This option is for an event that spans multiple days with no start and end times. You may add times to the event subtitle in the Titles and Links tab.


Agenda view event
This option adds an additional tab for you to add an agenda.
You can list out your agenda items here if your event has them.


Deadline display – This option is for something like an application deadline.
Use the “Now” button for the start time. The time on the end date is the time the application is due and must be filled in.


You may add more than one event to your post. Click Add event to add additional events.
Once you are done adding your events, Publish and Submit for Review.